

I don’t remember where exactly I first happened upon the idea of herb spirals…. But I do remember that I was immediately smitten.
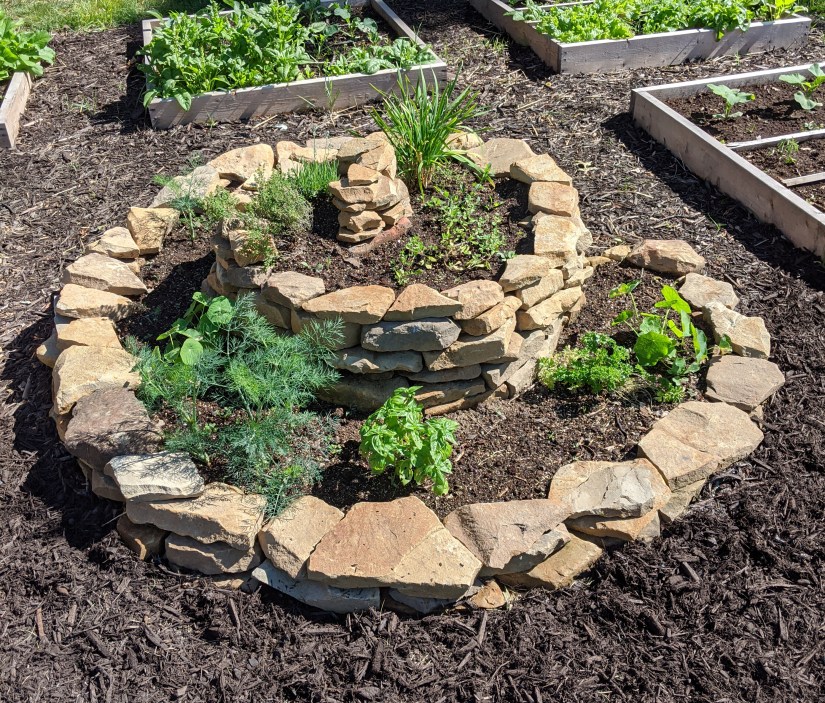
An herb spiral is a small spiral-shaped garden bed, usually built with stone or blocks, that is tallest in the center and tapers down to ground level on the outside edge.
The idea seems to have emerged within the permaculture movement of the 1970s and its emphasis on “permanent” or sustainable agriculture that works in harmony with nature.
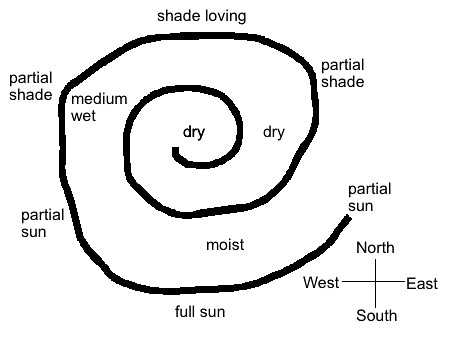
With their tandem beauty and functionality, herb spirals fit right in with the permaculture philosophy. Different herbs require different amounts of sunlight and moisture, and the winding levels of an herb spiral create microclimates that suit each plant. Herbs that thrive with full sun and drier soil go toward the top of the spiral, or on the southern-facing slopes. Plants that will do better with a little more shade or moisture belong on the northern side, or lower on the spiral.
I loved the idea of nourishing each herb with exactly what it needs.
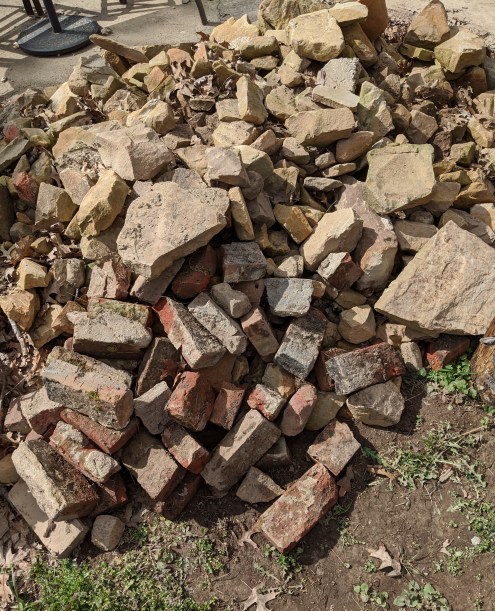
In addition, as luck would have it, I had a ton of stone to use for building the structure.
My husband and I have completed a couple of projects to improve drainage around the exterior of our house. This involved digging trenches for French drains around the foundation as well as digging trenches for pipes leading down to the road. (So much digging.) Every plunge of the shovel into the ground turned up another large stone, which we started collecting in a pile out back. (So many stones.) We didn’t have a specific use for all those stones, but it just seemed like, I don’t know, surely we’d find a project for them someday?
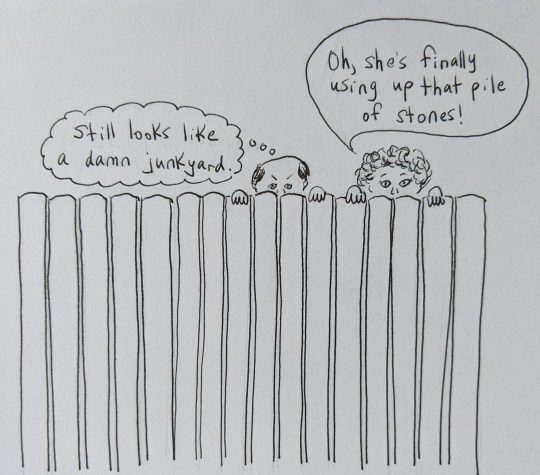
The stones continued to accumulate over the next couple of years as I dug in the ground to landscape and garden. I’m sure our neighbors loved the ever-growing mountain of stones on our patio. The stone coordinated quite nicely with the pile of wood chunks we plan to use someday when we install a wood-burning stove, as well as the leftover pieces of trim and siding from our never-ending home renovations.
At any rate, I had plenty of stone that was itching to be repurposed.
If you research herb spirals, you’ll see that people create the walls out of all sorts of materials. Bricks, flagstones, pavers, even glass bottles.


Although you can make the spiral any size that works well in your space, I found that a diameter of two-meters (or about six feet) was a pretty common measurement so that’s what I decided to do. If the spiral is too small, it won’t sufficiently create “microclimates” along its elevations. If it’s too large, you’ll have a hard time reaching the center of it for maintenance and harvesting of herbs. For a spiral of this width, many suggested a center height of one meter, but I thought that seemed disproportionately tall for my garden area. At its center, my spiral is more like 24″.
Step 1: Locating
The first rule of herb gardens is to make sure they’re convenient to your kitchen. You’re much more likely to snip and use fresh herbs if it’s not a hassle to do so. My garden area is just outside the kitchen door, so that was a non-issue. However, I took my time choosing a spot within the garden for the herb spiral, knowing that it would not be easy to relocate it if I changed my mind. I also studied several diagrams online to take into account the most advantageous north-south orientation. I identified a spot that would make the herb spiral a focal point at the center of my other raised garden beds, and then laid out the basic perimeter. I had already covered the area with weed-cloth, so it was ready for business.
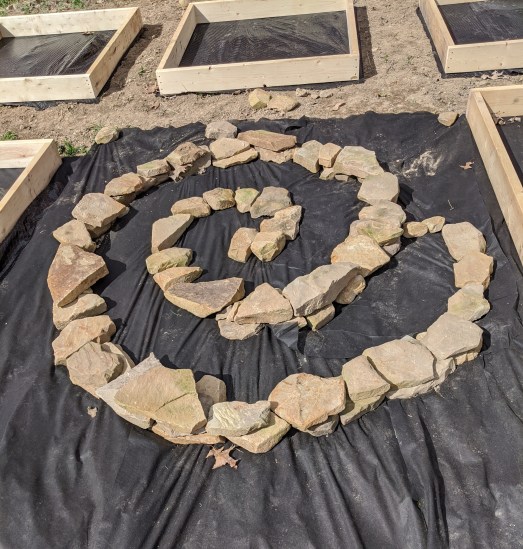
Step 2: Outlining
I cut a three-foot length of string and swung it around a post wedged in the center of my spiral, using small stones as placeholders to mark out the perimeter. Kind of like drawing a circle using a compass. From there I continued using small stones to demarcate the interior whorls of the spiral. I eyeballed the curves to make sure they were evenly spaced—about one-foot apart—and matched my intended design.
Step 3: Stone-Shopping
Next, it was time to shop the stone pile. As I sorted stones into several piles, large, medium, and small, I focused on finding stones with flat surfaces figuring they’d balance and stay in place better in the dry-fit wall.
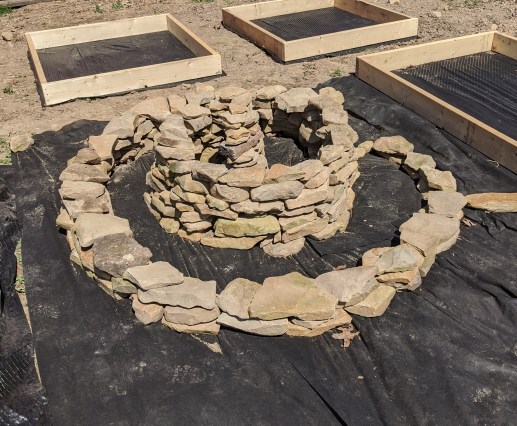
Step 4: Constructing
Now the part I was most excited about: Building the wall! For the foundation layer I chose large, flat stones, experimenting with different placements until I had formed a snug fit between each neighboring pair. I felt like I was working a puzzle with very heavy, dusty pieces. I laid out the foundation row for the entire spiral, following the curves I had outlined in Step 2. With the foundation in place, I continued adding rows of stone to the wall and graduated the height of the spiral until it reached a finished height in the center of about 24″. Not surprisingly, it got trickier to fit stones as the spiral grew. The foundation layer was easy, but each successive layer not only had to fit together horizontally, but also sit securely on the stones underneath it. Some people use mortar to lock their stones in place, but I wanted to keep my spiral as simple as possible. Mortar also felt like a really big commitment. I think I’m going to love the herb spiral, but what if it’s a flop? Much easier to dismantle it sans mortar. A trick I read to make your walls sturdy is to have them lean ever so slightly inward, to offset the outward-pushing force that the soil and herbs will create.
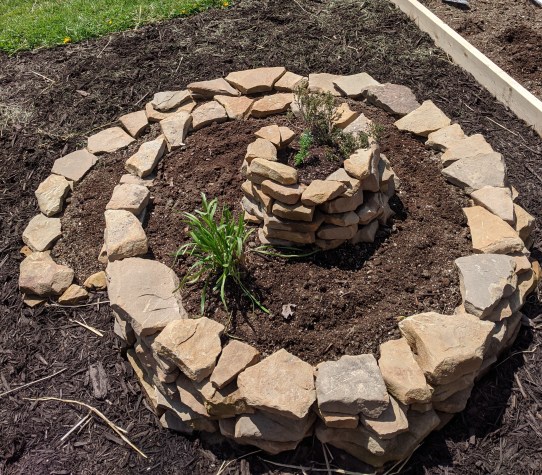
Step 5: Filling
With the spiral shell complete, it was time to fill it. A common gardening trick when filling deep containers is to use stones or rubble to eat up some of the negative space and reduce the amount of valuable soil needed. Many people do the same with herb spirals, particularly in the very center where the space is deepest. But where would I find a bunch of stones to fill it in?…
So yes, back to the stone pile for some little ones to toss in the herb spiral.
I used the same soil mixture for the herb spiral as I did in my other raised garden beds, a blend of peat moss, coarse vermiculite, and home-made compost. From last year’s herb garden, I transplanted some chives, thyme, and a lavender shoot, orienting them in places on the spiral where they will be snug and happy. For the rest of my herbs, I planted seedlings and seeds. The list below provides placement guidelines for many common herbs; the ones in CAPS are herbs I have actually planted so far:
Top: oregano, rosemary, LAVENDER, SAGE, lemongrass (plants that like it dry and sunny)
Mid-level, south-facing: BASIL, THYME, DILL, CILANTRO, MARJORAM (plants that need good light and drainage)
Low- to mid-level: CHIVES, PARSLEY, chamomile (plants that enjoy moist soil and partial sun)
Low-level, north-facing: MINT, lemon balm, catnip (plants that like it moist and shady)
It is also not a bad idea to interplant pest deterrents like marigolds and NASTURTIUMS.
All in all, I’m happy so far with the herb spiral! Time will tell if my construction skills were up to the task, and whether the microclimates encourage the herbs to thrive. It’s the end of June, and so far, so good. Stay tuned for updates later in the summer!


I absolutely LOVE this idea!
LikeLike