Create

Letterboxing 101

Let’s start with a riddle:

It’s not quite a scavenger hunt, though it does involve hunting.

It’s kind of like geocaching, but you read clues rather than coordinates.

It requires secrecy and pseudonyms, yet it’s wholesome enough for your grandma to do.

…………………………………………………………………………………

Think you’ve puzzled it out? Why, it’s letterboxing of course!

The Backstory

IMG_20181230_131250
This was the first letterbox I ever found. Coincidentally, cardinals are one of my favorite birds.

I learned about letterboxing 10 years ago when my niece was in kindergarten. Her teacher introduced letterboxing to the students, and my sister, a volunteer in the classroom, learned about it by extension. She was hooked from day one, and soon after shared her newfound hobby with me.

So, what is letterboxing? Here’s how it works: Someone conceals a waterproof box in a public location. Inside the box you’ll find a logbook and a hand-carved stamp. The hider posts clues online (websites listed below) with step-by-step instructions on how to find the box, and then YOU set off to find it! When you do find it, you use an ink pad to add the found stamp to your personal logbook. Then you add your personal stamp to the found logbook to document that you were there. An exchange of stamps. Date and sign the page (using your trail name—yes, you get to make up a trail name)—and that’s it!

IMG_20181228_160208 IMG_20181228_160226IMG_20181228_160233 IMG_20181228_160235

According to legend, letterboxing began in England in 1854. A hiking guide named James Perrott hid a bottle at the end of a difficult hike along Cranmere Pool in Dartmoor, England. He left a calling card in the bottle so that future finders could contact him, and encouraged these tenacious hikers to place their own cards in the bottle as well. Some years later, the bottle was replaced with a box, and hikers began leaving self-addressed postcards that the next finder would mail from their own hometown. (And in England, a mailbox often is called a letterbox.) The hobby continued to evolve and gain popularity in Dartmoor, but didn’t reach the U.S. until 1998, when Smithsonian magazine featured an article about letterboxing. (To learn more, you can read a detailed history of letterboxing HERE.) Today you can find letterboxes in every state around the country, and in fact it’s a fun way to explore and document places you’ve traveled.

IMG_20181230_105315.jpg

Letterboxing Gear

I have a little satchel with all my letterboxing gear that I keep in my car, so I’m ready at any moment to take advantage of a letterboxing opportunity. The letterboxing websites list all of the boxes in a particular area, and I like to scan these periodically and file those potential locations away in my memory. When we’re traveling, my husband loves when I request a little detour to seek out a letterbox. (Okay, well he at least tolerates my letterboxing enthusiasm.)

These are the essential supplies in my kit:

Stamp
Logbook
Pen
Ink pad
Wet wipes (while not essential, you’ll be digging around in bushes and under rocks sometimes; it can get a little messy)

IMG_20181224_142055_1 IMG_20181224_142434

You can get all of these things—stamp, notebook, ink pad—at any craft store. When I learned about letterboxing, I didn’t know at first how much I would enjoy it. I was hesitant to invest too much time or money in a hobby that might just fizzle out. If you want to just try it and see what it’s like, before buying too much gear, it is acceptable to use your thumbprint as your “stamp” to make a mark in the logbook of any letterboxes you find. If you decide that you like it but don’t have the time to carve your own stamp, there are plenty of ready-made options to purchase at the store. So whatever the situation, there’s no reason not to get out there and give it a whirl. Eventually you will probably want to carve your own personal stamp—that’s what you see in the photos—and my Letterboxing 201 post walks you through how to do that.

So Many Reasons to Love Letterboxing

Once you try letterboxing, I’m sure you’ll have your own list of reasons why you love it. Here are a few of mine:

1. Discover hidden gems: There are numerous parks and sites that are just far enough off the beaten path that I would never have encountered them if not for letterboxing. It gets me out and about and leads me on spontaneous adventures close to home. 

IMG_20181230_131227
A fellow letterboxer/Nancy Drew fan created this stamp.

2. Learn new things: People create letterboxes because they have something to share with the world. Sometimes they want to draw visitors to a historic or meaningful location. Other times, people create a letterbox—or series of letterboxes—to honor a particular person, place, or thing. I love the opportunity to learn something about history, pop culture, or the personal experience of a fellow adventurer.

3. Travel souvenir: I always tuck my letterboxing gear into my bag when I go on a trip. Wherever I am—a city, a national park, a nondescript suburb—chances are there is a letterbox somewhere nearby. The collection of stamps in my logbook is an evolving souvenir and a unique way to remember the places I’ve been.

4. Fun for all ages: I have been letterboxing with my young nieces and nephews, and I’ve been letterboxing with my grandma! I mean, who wouldn’t enjoy a hunt for hidden treasure boxes? But here’s a piece of advice: If you can take a child with you on a letterboxing jaunt, you’ll look much less suspicious snooping around bushes and trees. And never forget the cardinal rule of letterboxing: Be stealthy and do not advertise that there is hidden treasure nearby.

5. The occasional misadventure: Letterboxing excursions do not always proceed exactly to plan, but that is part of the fun. Here’s an example: I love cats, so I was excited to discover that there was a letterbox hidden at a local cat rescue organization. Sometimes stamps are stashed at an indoor location with the owner’s consent, and you have to ask for it to earn it. I must admit, I felt a little weird sidling up to the counter like, “Heyyyy, so … I think you have something for me? …” And then it was especially awkward when the girl had no idea what I was talking about. We rounded up another employee, who had a dim recollection of a letterbox being hidden there, but clearly it hadn’t been found in a long time—boxes do go missing sometimes. A letterboxer must accept the occasional fail. BUT since I was already there, I visited for a while with the numerous, and very affectionate, rescued cats. Fell right into their trap, lured to the shelter by a phantom letterbox those critters no doubt planted themselves.

Hit the Trail!

There are two main websites for the letterboxing community. On either one you can find letterboxes to search for:

Atlasquest.com

Letterboxing.org

I tend to use Atlasquest, although it is good to check both websites. My favorite way to locate boxes is to search by zip code. If you set up your own account, you’ll receive notifications when new stamps in your area are added. You’ll also be able to log your finds online, to keep track of your discoveries and offer feedback and comments to fellow letterboxers.

Screen Shot 2018-12-26 at 6.25.42 AM

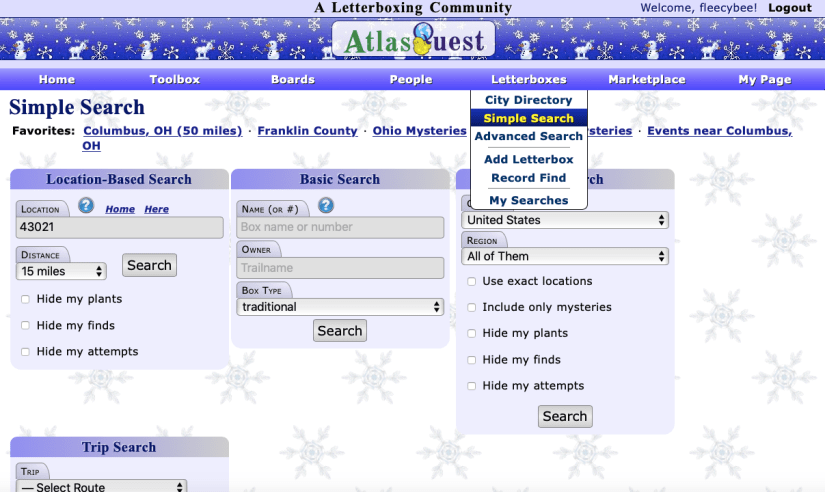
I have a hunch that once you try this, you’ll be hooked just like I was. I’ve even created two letterboxing series of my own, carving the stamps, writing the clues, and stashing the boxes out in the wild for others to find. If you’re ever in the Galena area (zip code 43021), you should try to find them!


Eat

A Student of Sauerkraut

Growing up, my family always ate pork and sauerkraut on New Year’s Day. These traditional foods are supposed to bring good fortune in the coming year. I never would have thought to attempt to harness the magic of sauerkraut at any other time of year, but would you believe that its power extends to new school years as well?

This discovery began with an interesting, and very unexpected, conversation with one of my students. At the beginning of the school year, I ask students to create a “picto-word” name card, in which they morph or change each letter of their name into a picture that tells something important about themselves. It’s a quick way to learn their names as well as a bit about about their personalities.

img_20181104_185117.jpg
What can you learn about ME from my picto-word? I’m good at holding a plank. Reading is my favorite pastime. I love to see worms in my compost, and I enjoy a vigorous hike.

As I examined one student’s picto-word, I asked him to tell me about the pictures and what they represented about him. I was particularly intrigued when he pointed out how he’d turned one of the letters in his name into a jar of sauerkraut. Seriously?! How cool! I’m used to seeing baseballs, video games, and pizza from sixth grade boys. I’m not sure most sixth graders would even know what sauerkraut IS, let alone eat it, let alone find it important enough to warrant a spot on their picto-word! But apparently, for him sauerkraut-making is a large-scale, multi-generational, all-hands-on-deck family tradition. I asked him a variety of questions about their process, all of which he answered quite knowledgeably.

Was my enthusiasm that obvious? I suppose so, because his parents sent him to school a few days later with none other than a jar of their homemade sauerkraut as a gift. I’m not sure I’ve ever received a teacher-gift I was more excited about!

My husband and I made embarrassingly short work of that jar of sauerkraut, which was worlds away from the store-bought bags or cans—no big surprise there. Tangy and a little spicy (they included jalapeños in that particular batch) and nicely crisp—not the watery mush that sometimes comes from the store. Now, theirs was pressure canned, which would have killed the beneficial microbes from the fermentation process, but working at the large scale they do, it’s probably a necessity. If they didn’t pressure can it they’d have to refrigerate it, and how would you locate enough refrigerator space to house 500 pounds of cabbage-turned-kraut?

I was inspired. I decided it was time to add sauerkraut to my growing repertoire of homemade foodstuffs.

The first time I made sauerkraut, I made the process more difficult than it needed to be. Following a recipe, I got out the food scale and carefully weighed five pounds of cabbage (this was about two medium-sized heads) and very carefully measured the recommended amount of salt. And it’s good to be careful the first time you make something, right? But since I’ve learned more about sauerkraut, I’ve realized the process is actually much more forgiving.

Mainly, the process for sauerkraut—as with other fermented foods—requires a small amount of active time on your part, and then plenty of patience. The instructions here will walk you through how to make sauerkraut in a one-quart mason jar, which is a very manageable amount.


What You’ll Need
:

  • One medium-sized head of cabbage
  • 1 1/2 tablespoons of Kosher salt
  • A large bowl for massaging the cabbage
  • A quart-sized mason jar
  • A jar weight, or water-filled baggie to keep cabbage submerged under liquid in jar (don’t worry, I’ll explain below)

What You’ll Do:

  • Slice the cabbage. At first I thought the easiest method would be to use the shredding attachment on my food processor, but that shredded the cabbage too finely. More akin to what you might want for coleslaw. It’s faster and simpler to just slice the cabbage into thin ribbons by hand on the cutting board. Don’t be alarmed at how, even using just one head, this will produce a veritable mountain of cabbage. The first time I did this, I couldn’t fathom how it ultimately was supposed to fit into a mason jar for the coming fermentation period.

IMG_20181007_102141

  • Place the cabbage in a large bowl and add the salt. Toss the cabbage to get it well coated, and then let it sit for about 15 minutes. This gives the salt time to start drawing some moisture out of the cabbage.

  • Roll up your sleeves and warm up your arms: It’s time to massage the cabbage. If your spouse is as considerate as mine, he might offer to let you warm up by massaging his shoulders. . . . But you should probably save your strength for the cabbage. Using your hands, squeeze and knead the salted cabbage. In just a few minutes, the cabbage will really begin to release its liquids. It is amazing how much the cabbage compresses and condenses during this step. See? It will fit into the jar after all.
  • Cram it. After about 10 minutes of massage, there should be a decent amount of liquid in the bowl. Cram the cabbage a handful at a time down into the mason jar, pressing each new layer firmly to squeeze out any air bubbles and settle the cabbage under the surface of the liquid. Make sure you don’t fill the jar all the way to the brim—you’ll need to leave a few inches of space at the top of the jar to add something to weigh down the cabbage. When you’re finished cramming, there should be enough liquid in the jar that the cabbage is completely submerged. If for some reason there is not, create a little extra brine by dissolving one teaspoon of salt in one cup of water, and add enough to the jar to cover the cabbage.

IMG_20181007_112144 IMG_20181007_112458

  • Cover it. The next to last step is to weigh the cabbage down with some kind of cover that will hold it beneath the liquid as it ferments. I found handy glass jar weights to be just the ticket—gently settle a weight on top of the cabbage and lightly screw the lid of the mason jar in place. In lieu of a glass weight, you can also nest a smaller-diameter jar inside the mason jar, or even use a small brine-filled plastic baggie for this task. (You add salt to the water-filled baggie in case it tears or breaks during the fermentation period, because you don’t want your kraut to get all water-logged. Double up the baggies to minimize your risk of a leak altogether!)

img_20181007_112649.jpg

  • Burp it. I will admit, I love this step. Every day or so during the fermentation period, crack the lid of the jar until you hear a little hiss of released air, then tighten it again. Good stuff is happening in there!

IMG_20181007_112753

And then you wait. The fermenting process for a jar this size typically takes about a week, but it largely comes down to a matter of taste. After a week, sample it and see if it’s reached a desirable level of tanginess and tenderness. It’s “done” when it tastes good to you! The longer it ferments, the sharper and more vinegary it will taste. So when you’re like, “Mmm, that’s good!” pop it in the fridge. The cooler temperatures halt the fermentation process, and it will keep in there for about six months.

I haven’t gone too crazy yet with additional ingredients and experiments, but I know there is a lot of potential here. In a nod to my student’s inspirational sauerkraut, I have made several batches with diced jalapeño added in—and it’s really good.

So give it a try! The holidays are drawing near, and I know firsthand how much a person loves to receive a jar of this as a gift! And of course New Year’s Day will be here before we know it. . . . What better way to ring in the new year than with some pork and homemade sauerkraut? 

Eat

A Couple of AIP Treats—No Trick!

I recently experimented with a special diet called the Autoimmune Protocol (AIP). I won’t go into tremendous detail about it here, but basically it’s an extreme restriction diet with a twofold goal: to identify foods that irritate your gut, and to incorporate foods that heal your gut. It’s been known for a long time how important your gut is to your overall health and wellbeing (I wrote about that more in my yogurt-making post), and the AIP diet seeks to restore the gut to a state of maximum efficiency.

So if you suspect that you have a food sensitivity that could be triggering an autoimmune response like joint pain, brain fog, gastrointestinal issues, or skin conditions, the idea is to eliminate ALL foods that could be potential culprits. It’s a somewhat intimidating list that includes grains, dairy, eggs, beans and legumes, nuts, seeds, nightshades, certain herbs and spices, refined sugar, and alcohol. After a period of at least 30 days (or longer, if your symptoms haven’t shown improvement in that time), you systematically reintroduce the foods in order to identify which ones do or do not cause issues for you.

But the AIP diet is as much about incorporating nutrient-dense, healing foods as it is about eliminating irritants. Fermented foods, organ meats, wild-caught fish, pastured meats, bone broth, a variety of colorful vegetables. . . . All of these earn the AIP stamp of approval and make your gut happy. There’s a definite learning curve with this plan, but it did get easier to follow each day.

I followed the AIP diet for about eight weeks, and after the initial adjustment and grieving period for coffee and chocolate had passed, I liked the diet quite well. I learned about some new ingredients and foods, and experimented with a lot of new recipes. Being so restrictive, the AIP diet is not necessarily designed to be a lifelong dietary strategy, but even now that I’ve transitioned out of the elimination phase, there are many aspects of it I plan to continue.

There were, of course, things that were hard about it. I met some friends for lunch and realized ahead of time that there was literally nothing on the restaurant’s menu that I could eat. Had it come to this? Smuggling food into restaurants? Luckily my friends weren’t too weirded out, or if they were, they did a good job hiding it. Then my brother threw a birthday party for his wife—who is kind of a food slut—and the theme of the party was All Her Favorite Junk Foods. Pizza, chicken wings, Chinese take-out, chocolate chip cookies. . . . That was a tough one. And in an especially cruel twist of fate, he asked me to pick up the wings for him on my way to the party.

Yeah. I ate some carrots and celery off the veggie tray.

But the hardest part of the AIP diet was my evening treat. I like to make healthy treats to enjoy with my husband as an evening snack. Simple fruit cobblers, black bean brownies, things like that. Of course there are recipes for AIP desserts and treats, but a lot of them called for exotic ingredients that were hard to find and rather expensive. Over the course of my eight weeks of AIP experimentation, however, I developed a couple of very solid treats that I am confident anyone would find delicious!


Treat #1: Coconut-Carob Balls

These take about five minutes to make, and they are the perfect bite when you need a quick snack, a little something sweet, or are really craving a hit of chocolate. There are tons of recipes out there for energy balls and bites, but none that I tried got the texture of the dough quite right—they were always too wet, or too dry. This one is just right.

Ingredients:

1/4 cup coconut butter* (soften just slightly)
1 mashed banana
1/4 cup shredded coconut
1/4 cup coconut flour
1/4 cup carob powder**
1/2 tsp cinnamon

Directions: Mash together the coconut butter and banana. Add all remaining ingredients and mix until you have a stiff dough. Roll into one-inch balls (you should get about 10-12), and refrigerate them for at least an hour. If you are a sweet-salty fan like I am, you might also sprinkle some sea salt on the bites.

IMG_20181007_150506

*Coconut butter might also be called “Coconut Manna,” and it is not the same thing as coconut oil. It is coconut oil along with some of the coconut fiber, which gives it a stiffer texture.

**Carob powder is a good AIP substitute for cocoa powder. I find it to be naturally less bitter than raw cocoa and to have a pleasant apple-y smell and taste. If these balls are not sweet enough for you, you could compensate by adding a little honey or maple syrup to the mix. The banana and cinnamon in this recipe, paired with the carob, provide all the sweetness I require.


Treat #2: Brownies (Zoo-kies)

I still haven’t hit upon the perfect name for these treats. Maybe you’ll have a suggestion. I tend to refer to them as “Zoo-kies,” but I feel like a better name is out there. . . . At any rate, once you try these, you might never go back to regular old brownies again!

Ingredients:

1 zucchini, cut into chunks
1 banana, cut into chunks
3 Medjool dates (make sure to remove the pits!)
1/4 cup oil (olive oil, avocado oil; either is good)
1 cup unsweetened applesauce (this is your egg substitute)
2/3 cup coconut flour
1/3 cup carob powder
1/2 tsp baking soda
1/2 tsp cinnamon

Directions: Place the first five ingredients in a food processor. Blend these for about 30 seconds, then scrape the bowl down and run it for a few more seconds. Add the dry ingredients and run the processor again until everything is combined (you might need to pause and scrape here too).

IMG_20181007_100252 IMG_20181007_100546

IMG_20181007_101014 IMG_20181007_151741

Spread the batter into an 8×8 baking dish prepared with a thin coating of coconut oil to prevent sticking. Bake at 375° for about 45-55 minutes.

(The texture of these can vary slightly from batch to batch, depending on how big your zucchini and banana were. But it’s all good! In general, though, these turn out more custard-y than a typical brownie.)

Now, these zoo-kies are good on their own, but I wanted to make them a little more special. Have you ever made icing with powdered sugar and milk? I wondered if I could create something like that using my AIP ingredients. The answer? Yes, yes I could.

AIP Icing

1/2 cup carob powder
Several Tbsp of coconut milk

Directions: In a small bowl, add coconut milk just a tablespoon or drizzle at a time to the carob powder. Mix until you have a smooth, spreadable icing. You will know it when you see it! After the zoo-kies have cooled, spread this icing on them and store them in the fridge. My husband and I agree that they taste best when refrigerated.


So whether you are on the AIP diet yourself or simply a hostage to it like my husband, hopefully you will enjoy these simple treats as much as we do!