Read

Rethinking Small Talk

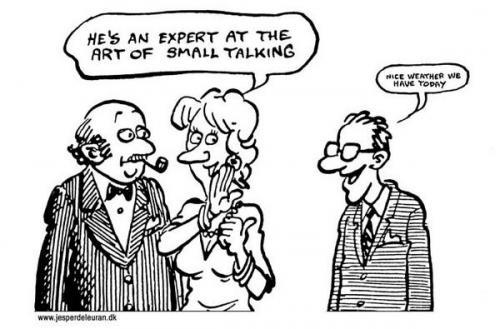
I wouldn’t call myself socially awkward, although I am a textbook introvert. While I do need and enjoy interactions with people, being around a lot of people for a lot of time requires a lot of energy from me. So it has always been easy for me to bemoan and disdain small talk. But let’s be honest, who doesn’t hate small talk? I’ve known exactly one person in my life who claimed to enjoy small talk. And he really probably did.

But for the rest of us? It’s a chore! We do it when we have to, and some of us navigate it pretty admirably, but at best we just endure it. I don’t totally suck at small talk, but I’ve often found myself feeling some anxiety before social occasions, dreading the upcoming small talk. What if I can’t think of something to talk about? What if there is an awkward silence? What if I seem boring or unfriendly?

I wondered if there might be a way to improve at small talk rather than live in perpetual dread.

Nerd alert: I googled “how to make small talk!” and “killer conversation starters!” And you know what? There is a lot of information out there. Apparently I’m not the only one who struggles with small talk. This was reassuring in and of itself, but what really bolstered my spirit was the knowledge that making small talk is a skill. There are strategies you can study and practice to improve at it. 

Well then. I’m a teacher! Learning and studying are right up my alley.

I kept reading, and when I checked out Debra Fine’s book The Fine Art of Small Talk, it got me looking at this social nicety in a whole new light.

First of all, small talk really does serve a purpose. It breaks the ice, builds rapport, and allows you to progress to deeper conversation. Some people scoff that we should just do away with small talk and dive right into the good stuff. But that would be like trying to jump onto a treadmill already whirring along at 10 mph rather than gradually dialing up the speed as your muscles get warm. You don’t have to stay in small-talk mode forever, but it’s probably wise to ease into deeper conversation with it.

Debra Fine enumerates many strategies for improving at small talk, but she leads off with a couple of key objectives (admonitions?) for all of us reluctant small talkers to take to heart: 

  • Take the Risk: Rather than wait for others to approach you, be the one who strikes up a conversation. Maybe even with a stranger! Everybody fears potential rejection, but it’s up to you to be brave and take the risk.
  • Assume the Burden: It’s not everyone else’s job to fill silences and keep conversation going. You have to assume the conversational burden of introducing topics, remembering names, and making others feel comfortable. 

Oops and oops. I could have stopped reading on page 7 and been light-years ahead of where I started. I definitely was not pulling my conversational weight. It started to seem a little selfish or self-indulgent to claim, “Oh I’m just no good at small talk” and sort of “opt out” of it. 

I started to look at small talk as a challenge rather than a chore. 

It was time to learn some actionable strategies to put into practice. Read on to learn my three favorite takeaways from Debra’s book.

Do a little homework!

Some people seem like they are naturally gifted in the art of small talk. But have you ever considered that maybe they are just better prepared? When you know that you’ll be attending an event that will involve small talk, spend some time ahead of time thinking about things you might talk about. If the gathering is with people I know, I might reflect on things I already know about them that I am curious to learn more about. If the event involves meeting new people, I might have a few potential icebreakers in mind, maybe related to current events or the season of the year. I also try to think about what I have been up to lately, so that I can say more than “Not much!” if someone inquires. It was a revelation to me that you don’t have to just go into small talk “cold.” A little mental preparation doesn’t interfere with spontaneity either—since I feel more relaxed and confident from the outset, it is easier for me to focus on listening and being curious.

Be intentional with your questions

This one might seem obvious. If you ask simple yes-or-no questions, the conversation will be over almost before it begins. But asking better, more open-ended questions requires that you build a habit of using forethought and creativity in the way you phrase things. One example Debra uses in her book is instead of the standard, “Are you married?/Do you have kids?” you can ask someone to “Tell me about your family.” Another one I like is to ask, “What was the highlight of your weekend?” rather than “How was your weekend?” Subtle tweaks, but likely to yield richer responses that will get a conversation rolling.

Use and offer free information (this one is my favorite)

“Free information” is stuff you learn about someone by being a careful observer, which can help you start or continue a conversation. People give free information with what they are wearing (statement jewelry? team apparel?), interesting photos or knickknacks in their home or office, or extra details they include in answering an open-ended question–which you can then use to spin off or delve deeper. I consider myself a fairly observant person, so I like this tip a lot. But it also helped me realize something important about myself. My default mode is to be pretty quiet and private, but by making more of an effort to provide “free information,” I could provide more fodder for conversation. Here’s what I mean:

If somebody asked me, “Do you like to exercise?” and I responded, “Yes, I do!” I’ve done nothing to help the person out and provide additional sparks to keep our conversation going. I answered their question, but I didn’t really play the conversational game. What if instead I answered, “Yes, I do! I was involved in sports all the way through college. Today I like to do a variety of things, otherwise I get bored. I used to go to a gym, but lately I’ve been working out at home.” I gave a lot of free information there! The person can follow up with questions about my college sport, what activities I like to do today, the gym I used to attend, home workouts. . . .

Somewhat counterintuitively, offering free information helps me focus less on myself and think more about how I can help the other person by providing potential conversational threads. I don’t want them to feel like they are “pulling teeth” to get information out of me.

So while I don’t think I’ll be qualifying for the Small Talk Olympics anytime soon, I feel much better prepared to meet the challenge head on. I even feel a little excited. The only way to improve at anything is to practice, and luckily, opportunities for small talk are all around us. 

Read

A Good Apology

It can be hard to say, “I’m sorry.”

But it can be even harder to say “I’m sorry” the right way.

It’s true—not all apologies are created equal. You’ve probably been on the giving and receiving end of apologies that left you feeling calmed and recentered, as well as sorries that left you disgruntled, confused . . . or even pissed off all over again.

It’s no secret that I’m pretty far from perfect, and I’m not afraid to say “I’m sorry” when I screw up. But I had no idea until recently that many of my apologies were actually screw-ups too! 

My moment of enlightenment began as I was listening to a recent episode on Brené Brown’s podcast “Unlocking Us.” Brené is a research professor whose studies on courage, empathy, shame, and vulnerability over the last few decades undoubtedly have transformed thousands of lives. My admiration for her work deserves its own special blog post. If you’re already familiar with Brené, then you’re saying, “I know, right??” If she’s new to you, I’d recommend starting with her TEDTalk “The Power of Vulnerability.” Brené is a masterful speaker. She’s also written a number of bestselling books, has a feature on Netflix, and now hosts multiple podcasts. Brené Brown is pretty much everywhere.

Anyway, in May 2020 Brené conducted a two-part interview with Dr. Harriet Lerner about the power and anatomy of a good apology. Harriet is a clinical psychologist and a prolific writer herself, with 12 published books about connection, fear, anger, and of course, apologies. Post-podcast I read her book Why Won’t You Apologize?, and I have to say, it was eye-opening. I appreciated that Harriet does not put herself on a pedestal, but rather offers many self-deprecating anecdotes in addition to examples from her therapy practice to elucidate the dos and don’ts of apologizing.

41Y-YPOrnzL._SX322_BO1,204,203,200_

(Sidebar of sorts: While we’re at it, we probably should just go ahead and read all of Harriet’s books. I’ve added Marriage Rules, The Dance of Connection, and Fear and Other Uninvited Guests to my list of finished reads, and man. She’s good. In my head I’ve started referring to her as the original Brené Brown. So much of what she writes about—vulnerability and connection, anxiety and shame, courage and resilience—has been further studied, documented, and spotlighted by Brené. They are both amazing.)

Obviously, apologies occur along a spectrum of misdeeds—plenty of unintentional oopsies can be smoothed over with a quick “Sorry!”, while other wrongs will require multiple conversations and the healing power of time. The majority of our experiences will fall somewhere in the middle. The thing with the more substantial apologies is that even when you recognize that you’ve hurt someone and owe an apology, there are so many potential pitfalls. To craft a genuine, healing apology requires reflection, courage, and whole-hearted listening. 

Okay, ready for some nuts and bolts? I’ll use an example of a medium-sized misdeed, something to which many people can probably relate, to highlight what I learned from Harriet about how to say I’m sorry. In the book, Harriet goes into great detail about all of the ways an attempted apology can go sideways. But I am going to share my TWO biggest takeaways from her book. I believe that if everyone simply put these two lessons into practice, we could improve the vast majority of our apologies.

It always helps to use a specific example, so here’s one (albeit hypothetical):

IMG_20200828_173426
Let’s say that my husband has a very important presentation for work tomorrow. He asks me to stop by the dry cleaner to pick up his lucky shirt, since he won’t have time to do it. But one thing leads to another during my own busy day, and it slips my mind. I totally forgot, and now the dry cleaner is closed. No lucky shirt. He’s a bit upset. What should I do?…

Lesson #1: Keep “but” out of it!

When you say “I’m sorry, but…” that “but” immediately negates your apology. Rather than smoothing over a wrong, in fact it probably made the person feel angry or hurt all over again. It signals defensiveness and deflection of accountability on your part.

Examples: “I’m sorry that I forgot to pick up your shirt, but my day was really hectic too,” or “I’m sorry that I forgot to pick up your shirt, but the dry cleaner really is closer to where you work than where I do.”

Lesson #2: Focus on your actions, not on the other person’s feelings.

When you focus on the hurt party’s feelings rather than on what you did, you are shifting the blame onto him or her—implying that their sensitivity is the real problem, not what you said or did. This kind of apology lacks contrition and accountability.

Examples: “I’m sorry that you were so upset when I forgot to pick up your shirt,” or “I’m sorry that what I did made you so angry.”

Do you see how these “apologies” are not likely to make him feel better? In each, it either feels like I’m shifting the blame, or pointing out how touchy he is for feeling hurt or upset. Even if you couldn’t quite put your finger on it, you can tell that they just don’t feel right.

So what, then, does a good apology sound like?

In her book, Harriet praises the apology formula created by business expert John Kador as being one of the best she’s seen. In his book Effective Apology, Kador says, “We apologize when we accept responsibility for an offence or grievance and express remorse in a direct, personal, and unambiguous manner, offering restitution and promising not to do it again.”

So that means my new and improved apology will:

Be specific and non-defensive 

Focus on my actions 

Contain a proportionate attempt at reparations

Here’s something I could say that might actually make him feel better!

“I’m sorry that I forgot to pick up your shirt. I told you that I would, and I didn’t come through. Next time I’ll be sure to leave myself a note so that I don’t forget. Can I help you rehearse so that you feel really confident for your presentation?”

Even though it might not erase the offense, a sincere apology will definitely help us to move on from the event.

Making bad apologies is just a bad habit for many of us. It will take mindful effort to start doing better. But simply by attending to the two lessons of leaving out “but” and focusing on my actions, I can improve most of my apologies. That feels very doable to me.

To more fully understand and appreciate the complexities of apologizing, you should read Harriet’s book. She goes into much greater detail about other ways to ruin an apology, shares some of the best apologies she’s ever heard, and explains when and if to factor in forgiveness. 

Who knew two little words could be so complicated?

Create

Herb Spiral

I don’t remember where exactly I first happened upon the idea of herb spirals…. But I do remember that I was immediately smitten.

An herb spiral is a small spiral-shaped garden bed, usually built with stone or blocks, that is tallest in the center and tapers down to ground level on the outside edge.

IMG_20200612_101347
My herb spiral, early June

The idea seems to have emerged within the permaculture movement of the 1970s and its emphasis on “permanent” or sustainable agriculture that works in harmony with nature. 

With their tandem beauty and functionality, herb spirals fit right in with the permaculture philosophy. Different herbs require different amounts of sunlight and moisture, and the winding levels of an herb spiral create microclimates that suit each plant. Herbs that thrive with full sun and drier soil go toward the top of the spiral, or on the southern-facing slopes. Plants that will do better with a little more shade or moisture belong on the northern side, or lower on the spiral. 

unnamed-2
Anatomy of an herb spiral


I loved the idea of nourishing each herb with exactly what it needs.

In addition, as luck would have it, I had a ton of stone to use for building the structure.

My husband and I have completed a couple of projects to improve drainage around the exterior of our house. This involved digging trenches for French drains around the foundation as well as digging trenches for pipes leading down to the road. (So much digging.) Every plunge of the shovel into the ground turned up another large stone, which we started collecting in a pile out back. (So many stones.) We didn’t have a specific use for all those stones, but it just seemed like, I don’t know, surely we’d find a project for them someday? 

The stones continued to accumulate over the next couple of years as I dug in the ground to landscape and garden. I’m sure our neighbors loved the ever-growing mountain of stones on our patio. The stone coordinated quite nicely with the pile of wood chunks we plan to use someday when we install a wood-burning stove, as well as the leftover pieces of trim and siding from our never-ending home renovations. 

IMG_20200412_151246

At any rate, I had plenty of stone that was itching to be repurposed.

If you research herb spirals, you’ll see that people create the walls out of all sorts of materials. Bricks, flagstones, pavers, even glass bottles. 

Although you can make the spiral any size that works well in your space, I found that a diameter of two-meters (or about six feet) was a pretty common measurement so that’s what I decided to do. If the spiral is too small, it won’t sufficiently create “microclimates” along its elevations. If it’s too large, you’ll have a hard time reaching the center of it for maintenance and harvesting of herbs. For a spiral of this width, many suggested a center height of one meter, but I thought that seemed disproportionately tall for my garden area. At its center, my spiral is more like 24″.

Step 1: Locating

The first rule of herb gardens is to make sure they’re convenient to your kitchen. You’re much more likely to snip and use fresh herbs if it’s not a hassle to do so. My garden area is just outside the kitchen door, so that was a non-issue. However, I took my time choosing a spot within the garden for the herb spiral, knowing that it would not be easy to relocate it if I changed my mind. I also studied several diagrams online to take into account the most advantageous north-south orientation. I identified a spot that would make the herb spiral a focal point at the center of my other raised garden beds, and then laid out the basic perimeter. I had already covered the area with weed-cloth, so it was ready for business.

Step 2: Outlining

I cut a three-foot length of string and swung it around a post wedged in the center of my spiral, using small stones as placeholders to mark out the perimeter. Kind of like drawing a circle using a compass. From there I continued using small stones to demarcate the interior whorls of the spiral. I eyeballed the curves to make sure they were evenly spaced—about one-foot apart—and matched my intended design.

Step 3: Stone-Shopping

Next, it was time to shop the stone pile. As I sorted stones into several piles, large, medium, and small, I focused on finding stones with flat surfaces figuring they’d balance and stay in place better in the dry-fit wall. 

IMG_20200402_155428
Ye olde stone pile

Step 4: Constructing

Now the part I was most excited about: Building the wall! For the foundation layer I chose large, flat stones, experimenting with different placements until I had formed a snug fit between each neighboring pair. I felt like I was working a puzzle with very heavy, dusty pieces. I laid out the foundation row for the entire spiral, following the curves I had outlined in Step 2. With the foundation in place, I continued adding rows of stone to the wall and graduated the height of the spiral until it reached a finished height in the center of about 24″. Not surprisingly, it got trickier to fit stones as the spiral grew. The foundation layer was easy, but each successive layer not only had to fit together horizontally, but also sit securely on the stones underneath it. Some people use mortar to lock their stones in place, but I wanted to keep my spiral as simple as possible. Mortar also felt like a really big commitment. I think I’m going to love the herb spiral, but what if it’s a flop? Much easier to dismantle it sans mortar. A trick I read to make your walls sturdy is to have them lean ever so slightly inward, to offset the outward-pushing force that the soil and herbs will create. 

IMG_20200402_155413IMG_20200403_134023

Step 5: Filling

With the spiral shell complete, it was time to fill it. A common gardening trick when filling deep containers is to use stones or rubble to eat up some of the negative space and reduce the amount of valuable soil needed. Many people do the same with herb spirals, particularly in the very center where the space is deepest. But where would I find a bunch of stones to fill it in?… 

So yes, back to the stone pile for some little ones to toss in the herb spiral.

I used the same soil mixture for the herb spiral as I did in my other raised garden beds, a blend of peat moss, coarse vermiculite, and home-made compost. From last year’s herb garden, I transplanted some chives, thyme, and a lavender shoot, orienting them in places on the spiral where they will be snug and happy. For the rest of my herbs, I planted seedlings and seeds. The list below provides placement guidelines for many common herbs; the ones in CAPS are herbs I have actually planted so far:

IMG_20200424_130840

Top: oregano, rosemary, LAVENDER, SAGE, lemongrass (plants that like it dry and sunny)

Mid-level, south-facing: BASIL, THYME, DILL, CILANTRO, MARJORAM (plants that need good light and drainage)

Low- to mid-level: CHIVES, PARSLEY, chamomile (plants that enjoy moist soil and partial sun)

Low-level, north-facing: MINT, lemon balm, catnip (plants that like it moist and shady)

It is also not a bad idea to interplant pest deterrents like marigolds and NASTURTIUMS.

All in all, I’m happy so far with the herb spiral! Time will tell if my construction skills were up to the task, and whether the microclimates encourage the herbs to thrive. It’s the end of June, and so far, so good. Stay tuned for updates later in the summer! 


IMG_20200625_095521
My herb spiral, late June