Eat

The Sweetness of Sourdough

Are you a fan of sourdough bread? That crusty outside, chewy inside, and distinctive tanginess? It tastes different from the typical loaf of bread today because it IS different. We have been baking bread for thousands of years, but modern technologies and techniques have dramatically changed the speed and nutritional content of the typical loaf. Quick-rise yeast breads must have seemed like magic when they were first introduced, but today we know that the real magic lies in a slow rise and long fermentation. True sourdough is a return to bread as it was meant to be.

In its simplest form, sourdough is just flour, water, and salt, fermented with lactic acid bacteria and wild yeast. And not only is it delicious, it also has myriad health benefits (it’s more easily digestible and its nutrients are more bioavailable than quick-rise yeast bread) since it is a fermented product.

People have been fermenting foods for ages. Before refrigeration, it was a way to preserve meat, dairy, and vegetables. The fermentation process spurs the growth of “good” bacteria and creates an acidic environment that discourages the growth of harmful bacteria. That still comes in handy today, but we’ve also discovered that fermented foods benefit our gut health. The probiotics—good bacteria and other microorganisms—in foods like yogurt and sauerkraut are great for the gut microbiome.

For a while now, I’ve wanted to explore the world of sourdough, because:

  1. It featured prominently in a fun novel I read recently
  2. It’s a San Francisco specialty . . . and I traveled to SF this summer
  3. Well, I’m a fan of all things fermented

The Novel

I’ll start with the novel. It’s called Sourdough, by Robin Sloan.

The story goes like this: A young woman fresh out of college is successfully wooed by a San Francisco tech company. Lois thinks this is the start of a wonderful thing, but in fact she quickly is glumped by the stress and expectations and monotony. The one bright spot in her existence is the daily takeout of spicy soup and sourdough bread she has delivered each evening. She happened across the menu by chance, two brothers who make food in their apartment and deliver it by motorcycle. They belong to an obscure ethnic group called the “Mazg,” and the food is a revelation to her. They call Lois their “number one eater!” But then, because of issues with their visas, the brothers have to leave the country unexpectedly. Lois is devastated, but as a parting gift the brothers make a final delivery to her: a small crock containing their “culture.” Or as it’s more commonly known, the starter for their sourdough bread. 

Lois is skeptical. She programs robots, she does not bake bread. (Or attend to ANY domestic matters, really.) But she follows their instructions for keeping the starter alive, feeding it, playing their special Mazg music for it, and even making bread with it. And the bread unlocks something in her. It sets her life on a whole new trajectory. There is something special, perhaps even magical, about that starter.

So What Is a Starter?

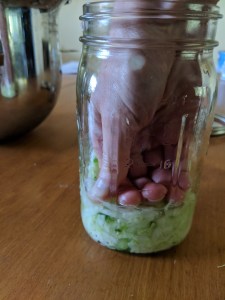
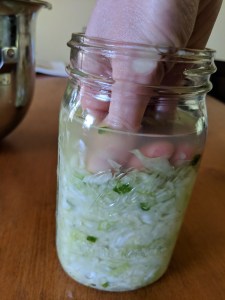
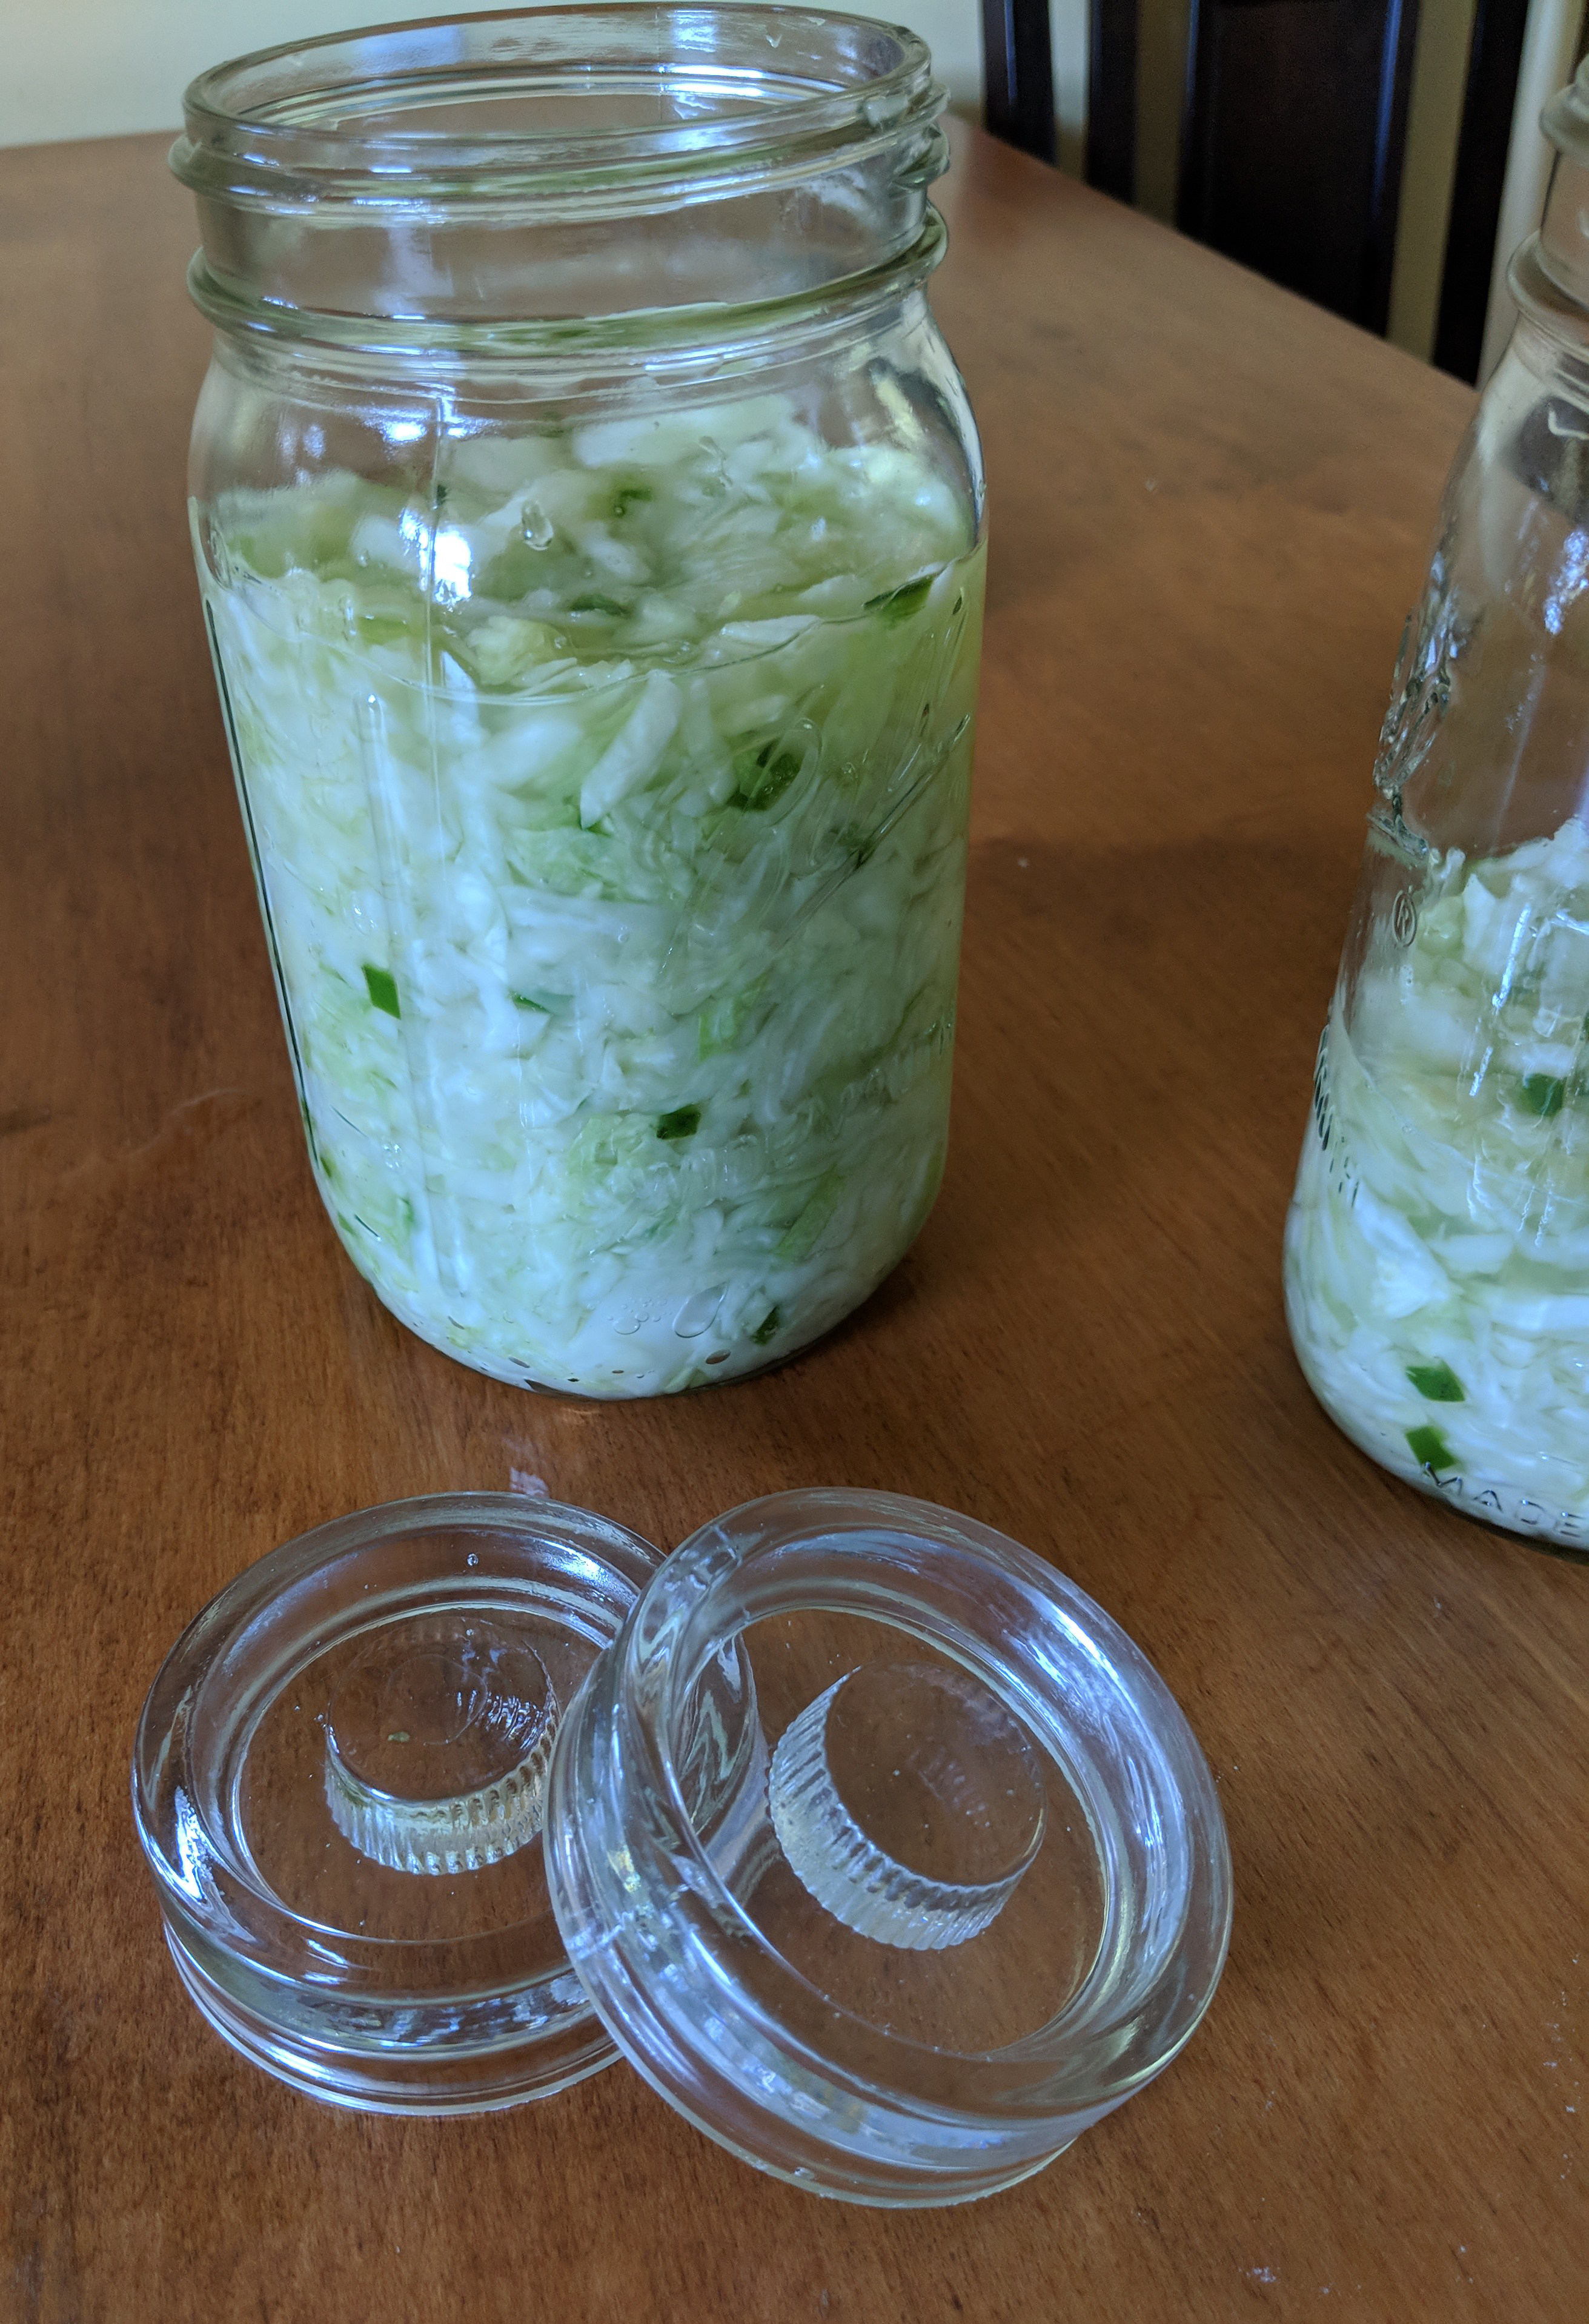
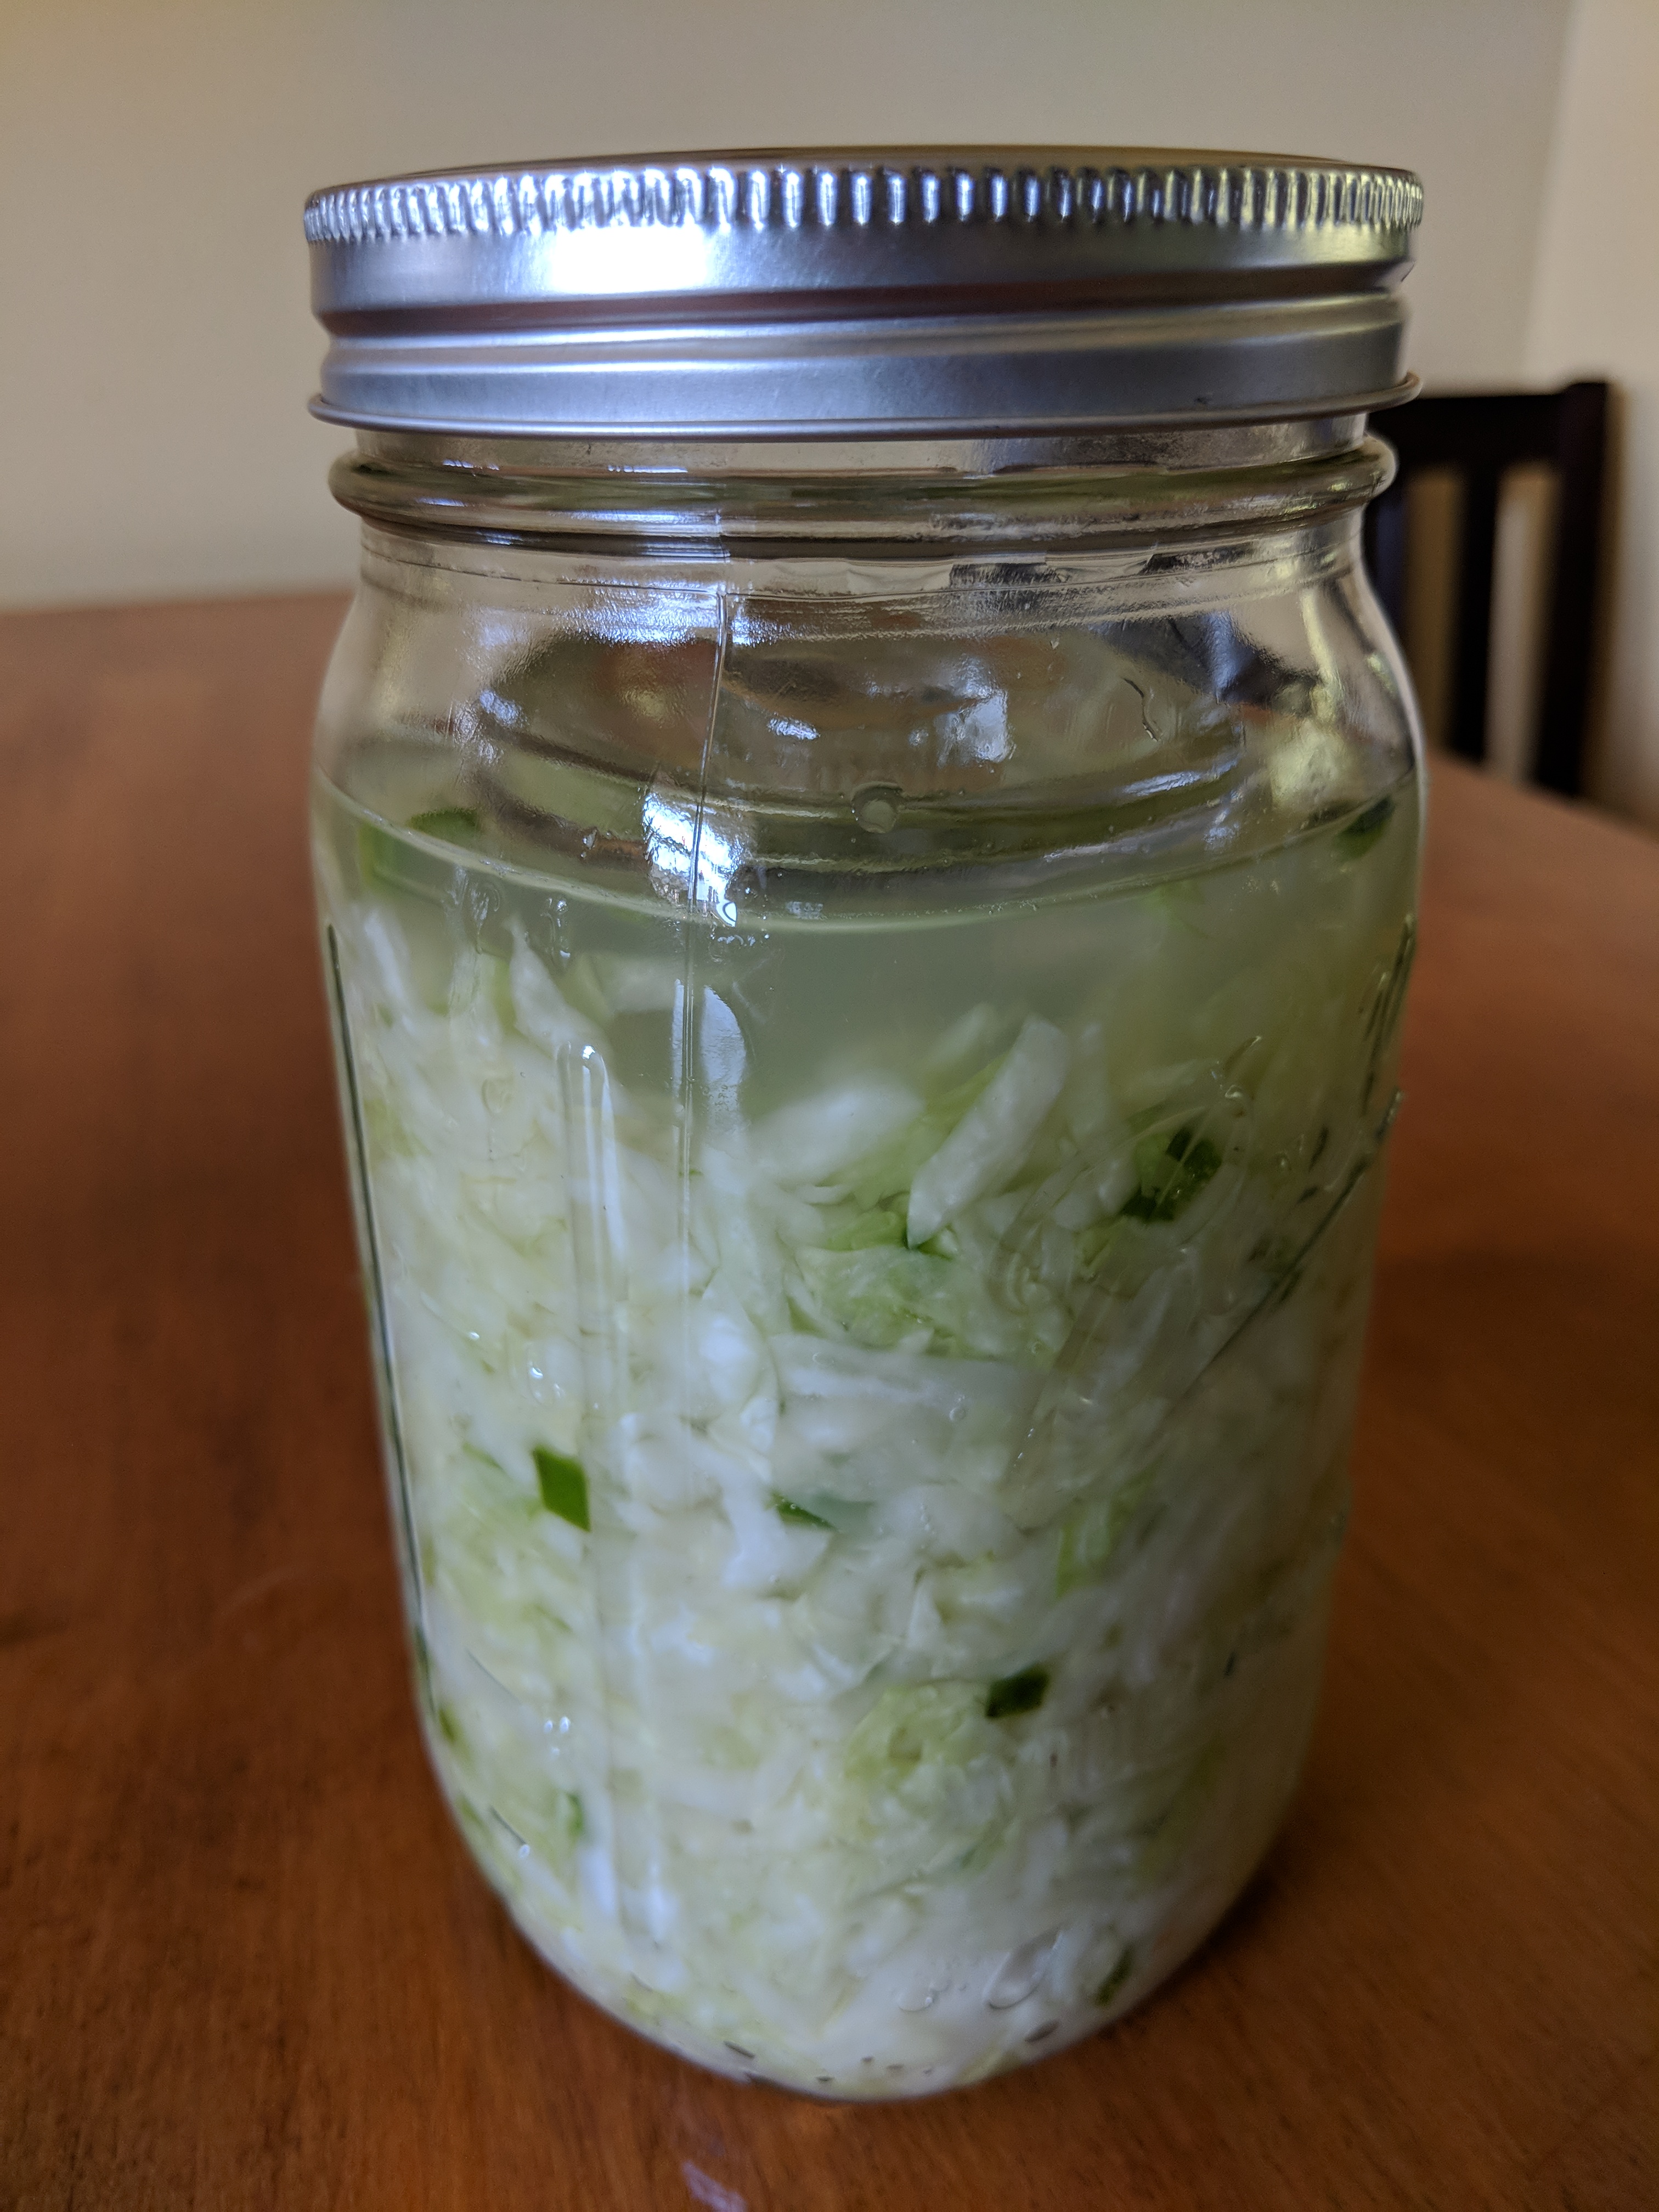
Some fermented foods require the addition of a “starter” culture of yeast and bacteria to kick off and facilitate the fermentation process. When you make sourdough, yogurt, or kombucha, for example, you must include some starter along with your other raw ingredients—you might think of the starter as a concentrated dose of the necessary yeast and bacteria. Without the starter, the crock of milk (for yogurt), sweetened black tea (for kombucha), or slurry of flour and water (for bread) will just spoil or turn moldy. Other foods, like sauerkraut and kimchi, will ferment just fine by allowing the naturally-occuring, wild bacteria that are present everywhere to proliferate in the jar. 

Source

Getting Started

With my interest in probiotics and fermentation, how could I not be inspired to experiment with sourdough too? Having a little crock of bubbling culture that needs tended, cultivated, kept alive? I loved the idea of having a special generations-old brew entrusted to me, but—unlike Lois—I didn’t know anyone who makes sourdough.

Until: About a week after returning from a trip to San Francisco this summer (where yes, I ate sourdough at Boudin’s bakery on Fisherman’s Wharf), my sister-in-law texted me: “Hey, do you want some sourdough starter? My friend gave me some. I can share it with you.”

Clearly, this was a sign from the universe.

I got busy reading up on sourdough starter care. It felt a bit like adopting a new pet. It IS a living thing, after all, and requires regular feeding. This sourdough tutorial from Emilie Raffa was a helpful source, as was her book Artisan Sourdough Made Simple

I was excited but also a little nervous to take possession of the starter—would I be able to keep it alive?

As it turns out, feeding it is actually quite simple. People who bake a lot keep the starter at room temperature and feed it once or twice a day. Less-frequent bakers like me can store the jar of starter in the refrigerator and feed it once a week. When you feed it, you scoop out and discard about half of the current starter (otherwise it will outgrow its container!), then stir in equal weights of flour and water. (A big thing in sourdough, as well as in baking in general, is the WEIGHT of ingredients. Weight and volume are two different things. My feedings comprise about 1/2 cup of flour and 1/4 cup of filtered water, or 75 grams of each. Different volumes, same weight.) And if you find it painful to just “throw away” half of your starter at every feeding, don’t despair. There are actually lots of recipes that use up the discard! 

Down the sourdough rabbit hole I went. Around the corner of a particularly alluring tunnel, I learned that you can create your OWN starter.

There are wild yeasts everywhere—in us, on us, around us—and you can get them to colonize a crock of flour and water if you provide the right conditions.

The process of creating a starter sounded a little fussy, but also . . . too easy. I really just mix together some flour and water, and the magic will happen? I mean, you do have to mix the correct proportion of flour and water, and you do have to house the crock at an advantageous temperature, and you DO have to feed the concoction every day for about five days. . . . But if you follow those steps, you can grow your very own starter culture.

I was curious: Does that mean that sourdough from starters grown in different parts of the country, or world, tastes different? 

Supposedly. The natural variety in local yeasts and bacteria is believed by some to yield differences in the breads produced. San Francisco attributes its sourdough stardom to a special bacteria (Lactobacillus sanfranciscensis) that thrives in that particular climate. On the Cultures for Health website, they even sell a special “San Francisco Style” sourdough starter! (However, that same bacteria has been found all over the world in places with similar climates, so as with most things sourdough-related . . . it’s not a simple answer.)
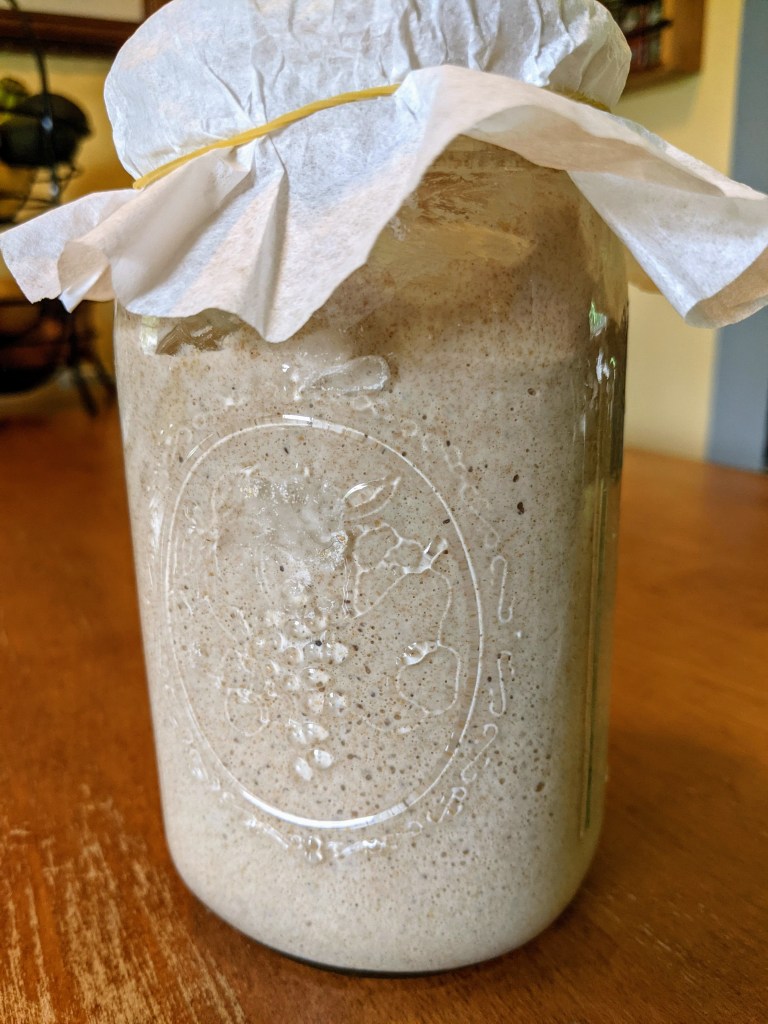
Growing My Starter

It was July in Ohio when I attempted my homegrown starter. Nice and warm, good conditions for fermentation. Temperature plays a big role in fermentation rates, which is part of what makes baking sourdough both an art and a science. You have to develop an understanding of how the starter and dough should look, smell, feel. The process is not exactly the same all year long, which can be unsettling if you just want a formula to follow! 

To give my starter the best chance of success, I did everything by the book. Stone-ground whole-wheat flour. Non-chlorinated filtered water. Kitchen scale and digital thermometer. I measured the weights of the ingredients; I checked and adjusted the temperature of the water (82 degrees). Ambient temperature of the home set at 75-80 degrees.

And what do you know. It worked!

After the first 24 hours, I saw a few tiny bubbles in the mixture. I discarded half of the starter, fed it the prescribed amounts of flour and water, and waited another 24 hours. The mixture bubbled and doubled in size. It did this for the next several feedings as well. After five days, the starter was doubling in size in just a couple of hours, and it also passed the “float test.” (Not a foolproof method, but one way to check if your starter is ready. You put a little dollop in some water and see if it floats. If it does, it’s ready.) Time to make some bread!

If I launch into a whole tutorial on making sourdough bread, this blog will be really long. It is a . . . lengthy process. Frankly it’s a bit daunting at first, when you see all the steps and the time involved. It is not all hands-on time, but from start to finish it’s like a 24-hour process to bake a loaf of sourdough. And it takes a lot of practice, to learn how different types of dough behave, and how the ambient temperature impacts the results. However, when you succeed in producing a beautiful, crusty, bubbly loaf of sourdough for the first time? All worth it!

Here’s the first ever loaf made with my homegrown starter. I forgot to score the top of the dough before baking the bread, but it turned out dang good!

Reading List

You may find, as I did, that the more I learned about making sourdough, the more questions I had! It’s fascinating: the history, the science, the artistry. Here are a few resources that you might find useful on your own sourdough adventures.

Sourdough Bread: A Beginner’s Guide by Emilie Raffa
In this blog post, Emilie walks you through the entire sourdough-making process. She explains everything very clearly and provides many helpful tips. I especially liked her sample baking schedule, because it can be tricky to figure out the timing of such a lengthy process.

The Sourdough School by Vanessa Kimbell
If you want to get really deep into the science of sourdough, Vanessa’s your lady. This book is incredibly detailed. I mean, she runs a school in England dedicated entirely to the baking of sourdough! Depending how serious you get about your bread, a field trip might just be in order.

This blogger provides a list of recipes for using the discard from your starter. She also provides a tutorial for creating a starter from scratch. 

If you’re interested in creating some other fermented foods, I have written about making yogurt and sauerkraut in previous posts.

Eat

Banana Carob AIP Brownies

In an earlier post, I shared a recipe for an AIP-compliant treat I call “Zookies”—Zucchini Brownies. In this one, I’ll introduce a recipe that I like even better! Why do I prefer the Banana Carob Brownies? Well, the ingredient list is a bit shorter, the texture is dense but crumbly (Zookies are a little more custard-like), and you can prepare the batter in a stand mixer (so clean up is a breeze). 

Now, I do not claim to be a nutritionist or an AIP expert—I’m just a person who has learned a thing or two about the Autoimmune Protocol (AIP) as a matter of necessity. There are many excellent books, websites, and podcasts available for those who want or need to learn more.

It can be tough to follow the AIP, especially during the elimination phase with so many foods removed from your cooking repertoire (no eggs, no grains, no dairy, no sugar, no beans or legumes, no nightshades, no caffeine, no alcohol). Plus if you’re following the AIP, you’re probably already struggling with some difficult and frustrating health issues. That’s a lot. 

But following the AIP isn’t just about cutting out certain foods; it’s equally focused on incorporating nutrient dense foods into your diet. In the spirit of that, I feel like I should be extolling the virtues of beef liver or cruciferous veggies. . . . But honestly, sometimes you just want to have a little treat. This one is easy to make, is AIP-compliant, and is so dang good! I’d come across other recipes that are similar, but they always seemed to include an ingredient or two I didn’t have on hand, like gelatin or tigernut flour. After a bit of experimentation, I refined the recipe below, which delivers delicious results every time. 

Ingredients:

3 ripe bananas
1/2 cup unsweetened applesauce
1/4 cup oil (olive, avocado)
2/3 cup coconut flour
1/3 cup carob powder*
1/2 tsp baking soda
1/2 tsp cinnamon

*Carob powder is a good ingredient to explore while on the AIP. Carob is naturally sweet, is a good source of fiber and antioxidants, and is a terrific substitute for cocoa or cacao (which are off the table). Carob powder comes from the pods of the carob tree, which contain a pulp that can be dried, roasted, and ground. It makes these brownies deliciously chocolatey!

Here’s what you do:

1) Preheat oven to 350°. Lightly oil a 9×9″ baking dish.

2) Put all of the ingredients into the bowl of a stand mixer. Mix thoroughly.*

3) Spread batter into baking dish (it will be thick) and bake for 25-30 minutes.

4) After the brownies have cooled, frost them if desired (recipe below) and then store them in the refrigerator.

*If my bananas are not at the ideal ripeness (ideal = speckled with brown spots), it’s helpful to mash them up a bit first and then add all of the other ingredients to the bowl. Mashing the bananas and then mixing in the other ingredients by hand would also work if you do not have a stand mixer. That should be a decent arm workout, too.

Frosting

The frosting is really the thing that makes these brownies feel decadent. When you store them in the refrigerator, the frosting hardens into a fondant-like texture. Sinking your fork into them isn’t exactly like cracking into a creme brûlée, but it’s somewhere along that spectrum.

1 T coconut oil, melted
1/2 cup carob powder
3 to 5 T water

Melt the coconut oil, add the carob powder to the bowl, and then add water a few tablespoons at a time, mixing thoroughly and adding more water until the consistency is thick but spreadable. Smooth it over your cooled brownies and pop them in the fridge to be enjoyed a few hours later.

I hope you love them as much as I do!

Eat

A Student of Sauerkraut

Growing up, my family always ate pork and sauerkraut on New Year’s Day. These traditional foods are supposed to bring good fortune in the coming year. I never would have thought to attempt to harness the magic of sauerkraut at any other time of year, but would you believe that its power extends to new school years as well?

This discovery began with an interesting, and very unexpected, conversation with one of my students. At the beginning of the school year, I ask students to create a “picto-word” name card, in which they morph or change each letter of their name into a picture that tells something important about themselves. It’s a quick way to learn their names as well as a bit about about their personalities.

img_20181104_185117.jpg
What can you learn about ME from my picto-word? I’m good at holding a plank. Reading is my favorite pastime. I love to see worms in my compost, and I enjoy a vigorous hike.

As I examined one student’s picto-word, I asked him to tell me about the pictures and what they represented about him. I was particularly intrigued when he pointed out how he’d turned one of the letters in his name into a jar of sauerkraut. Seriously?! How cool! I’m used to seeing baseballs, video games, and pizza from sixth grade boys. I’m not sure most sixth graders would even know what sauerkraut IS, let alone eat it, let alone find it important enough to warrant a spot on their picto-word! But apparently, for him sauerkraut-making is a large-scale, multi-generational, all-hands-on-deck family tradition. I asked him a variety of questions about their process, all of which he answered quite knowledgeably.

Was my enthusiasm that obvious? I suppose so, because his parents sent him to school a few days later with none other than a jar of their homemade sauerkraut as a gift. I’m not sure I’ve ever received a teacher-gift I was more excited about!

My husband and I made embarrassingly short work of that jar of sauerkraut, which was worlds away from the store-bought bags or cans—no big surprise there. Tangy and a little spicy (they included jalapeños in that particular batch) and nicely crisp—not the watery mush that sometimes comes from the store. Now, theirs was pressure canned, which would have killed the beneficial microbes from the fermentation process, but working at the large scale they do, it’s probably a necessity. If they didn’t pressure can it they’d have to refrigerate it, and how would you locate enough refrigerator space to house 500 pounds of cabbage-turned-kraut?

I was inspired. I decided it was time to add sauerkraut to my growing repertoire of homemade foodstuffs.

The first time I made sauerkraut, I made the process more difficult than it needed to be. Following a recipe, I got out the food scale and carefully weighed five pounds of cabbage (this was about two medium-sized heads) and very carefully measured the recommended amount of salt. And it’s good to be careful the first time you make something, right? But since I’ve learned more about sauerkraut, I’ve realized the process is actually much more forgiving.

Mainly, the process for sauerkraut—as with other fermented foods—requires a small amount of active time on your part, and then plenty of patience. The instructions here will walk you through how to make sauerkraut in a one-quart mason jar, which is a very manageable amount.


What You’ll Need
:

  • One medium-sized head of cabbage
  • 1 1/2 tablespoons of Kosher salt
  • A large bowl for massaging the cabbage
  • A quart-sized mason jar
  • A jar weight, or water-filled baggie to keep cabbage submerged under liquid in jar (don’t worry, I’ll explain below)

What You’ll Do:

  • Slice the cabbage. At first I thought the easiest method would be to use the shredding attachment on my food processor, but that shredded the cabbage too finely. More akin to what you might want for coleslaw. It’s faster and simpler to just slice the cabbage into thin ribbons by hand on the cutting board. Don’t be alarmed at how, even using just one head, this will produce a veritable mountain of cabbage. The first time I did this, I couldn’t fathom how it ultimately was supposed to fit into a mason jar for the coming fermentation period.

IMG_20181007_102141

  • Place the cabbage in a large bowl and add the salt. Toss the cabbage to get it well coated, and then let it sit for about 15 minutes. This gives the salt time to start drawing some moisture out of the cabbage.

  • Roll up your sleeves and warm up your arms: It’s time to massage the cabbage. If your spouse is as considerate as mine, he might offer to let you warm up by massaging his shoulders. . . . But you should probably save your strength for the cabbage. Using your hands, squeeze and knead the salted cabbage. In just a few minutes, the cabbage will really begin to release its liquids. It is amazing how much the cabbage compresses and condenses during this step. See? It will fit into the jar after all.
  • Cram it. After about 10 minutes of massage, there should be a decent amount of liquid in the bowl. Cram the cabbage a handful at a time down into the mason jar, pressing each new layer firmly to squeeze out any air bubbles and settle the cabbage under the surface of the liquid. Make sure you don’t fill the jar all the way to the brim—you’ll need to leave a few inches of space at the top of the jar to add something to weigh down the cabbage. When you’re finished cramming, there should be enough liquid in the jar that the cabbage is completely submerged. If for some reason there is not, create a little extra brine by dissolving one teaspoon of salt in one cup of water, and add enough to the jar to cover the cabbage.

IMG_20181007_112144 IMG_20181007_112458

  • Cover it. The next to last step is to weigh the cabbage down with some kind of cover that will hold it beneath the liquid as it ferments. I found handy glass jar weights to be just the ticket—gently settle a weight on top of the cabbage and lightly screw the lid of the mason jar in place. In lieu of a glass weight, you can also nest a smaller-diameter jar inside the mason jar, or even use a small brine-filled plastic baggie for this task. (You add salt to the water-filled baggie in case it tears or breaks during the fermentation period, because you don’t want your kraut to get all water-logged. Double up the baggies to minimize your risk of a leak altogether!)

img_20181007_112649.jpg

  • Burp it. I will admit, I love this step. Every day or so during the fermentation period, crack the lid of the jar until you hear a little hiss of released air, then tighten it again. Good stuff is happening in there!

IMG_20181007_112753

And then you wait. The fermenting process for a jar this size typically takes about a week, but it largely comes down to a matter of taste. After a week, sample it and see if it’s reached a desirable level of tanginess and tenderness. It’s “done” when it tastes good to you! The longer it ferments, the sharper and more vinegary it will taste. So when you’re like, “Mmm, that’s good!” pop it in the fridge. The cooler temperatures halt the fermentation process, and it will keep in there for about six months.

I haven’t gone too crazy yet with additional ingredients and experiments, but I know there is a lot of potential here. In a nod to my student’s inspirational sauerkraut, I have made several batches with diced jalapeño added in—and it’s really good.

So give it a try! The holidays are drawing near, and I know firsthand how much a person loves to receive a jar of this as a gift! And of course New Year’s Day will be here before we know it. . . . What better way to ring in the new year than with some pork and homemade sauerkraut?